This is part of my Web Workflow using Adobe Lightroom.
Adobe Lightroom is such an efficient tool, I developed a method for managing the web sites I create so that updates are available with minimum fuss and little manual work. The hard part is creating the first page or gallery. After that, maintenance is easy!
Using Collections in the Library Module and Templates in the Web Module are the keys to managing your web sites through Lightroom. We will discuss the creation of a gallery and then the maintenance plan showing each step along the way.
Creating the Collection For the Gallery
By now you have probably already created a gallery and tested it so that you have something to look at. Bear with me and follow these steps to create a new gallery so that it will be easy to update.
First, use the Library Module and select a group of images that should be shown in a single gallery for your web site. Use the SHIFT key to select multiple images in a row and the CRTL key to select images that are not immediately next to each other. With these images selected, go to the left panel and expand the Collections Pane. Be sure not to click on any of the collections.
As an alternative method, and one I prefer, clear the Quick Collection by pressing and holding the SHIFT and ALT keys and then pressing the B key. Then, click on each photo to add to the gallery and press the B key. Do this for each individual or group selection of images. You can find photos, scroll around and not worry about de-selecting some of the images. When you are done, click on the Quick Collection under the Library Panel and select all the photos before proceeding to the next step. This time you can click the first photo and SHIFT click the last photo or use the Edit, Select All menu item (CTRL-A is the shortcut for that menu item).

You can either click on the plus sign contained in the Collections Panel header, or
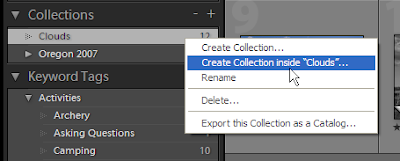
right-click on any of the existing collections and choose either a) create collection or b) create collection in xxxx. The first item will create a new collection at the base level and the second menu item will create a collection contained within an existing folder. When you choose one of these options, or press the plus sign as shown above, you get the following dialog box:
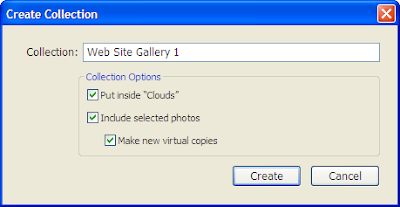
Note that there are three check box choices after inputting a collection name. They are:
- put inside xxxx
- include selected photos
- make new virtual copies
Check the first item to include it under the already highlighted folder or the folder you right-clicked on. Check the second item to include the photos we selected in the first step. Check the final item to make virtual copies of the images before adding them to the collection.
My preference is to use virtual copies in a collection so that I can change the development look, the cropping, the description and any of the other meta data for the purposes of the gallery. Also, virtual copies take up very little room on the hard drive.
Using this method you can organize your collections under folders. For example, you can create a "collection" titled, 'My Web Site.' To do this, open the Create Collection dialog box and de-select the checkbox to include the selected images. This will create a collection with no images in it which is the same as a folder. Then, right-click on the newly created collection, 'My Web Site' in this example, and create a collection underneath it. For example, create the collection, 'My First Gallery.'
Setting Up the Web Web Gallery
After creating the collection of images, go to the Web Panel and select a web gallery to create a web page with. Change all the settings and colors until achieving the look for this gallery. The images should be previewed on the screen.
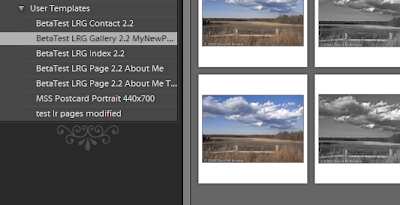
If you haven't created a template shortcut under the Template Browser Panel then go ahead and do so. This is done by clicking the ADD button at the bottom of the left hand pane or by right-clicking in the Template Browser Panel just like we did working with Collections. For example, you could name this one 'My First Web Gallery.'
After adding the new Web Template and storing the settings, perform the upload to your web site.
Now you have a published Web Gallery that can be viewed and used. So what do we do when we want to change the images?
Maintaining the Web Gallery
To maintain the Gallery we only need to perform the following steps:
- Select additional images
- Add them to the Collection
- Remove any images desired from the Collection
- Call up the Web Template saved
- Upload the changes
So, first go to the Library Module and select the collection we used to create the web gallery. In our example, we called it 'My Web Site'. Review the images to see what might need added. Then find those images in the Library and drag the image to the collection on the Collections Panel. If there are many images, you can use the Quick Collection as shown above. Just add the new images and drag them all to the 'My Web Site' collection.
 Now review the total collection again and remove any of the images you no longer want in the gallery. There are two ways to accomplish this. First, you can right-click on an image in the Collection and choose the 'Remove from collection' menu item as shown here. If you added virtual images to the collection as I prefer to do, then you can delete the image because it is not an original image and it shouldn't be used anywhere else. This is done by clicking on the image and hitting the DEL key.
Once this is done, move to the Web Module and click on the Template Browser panel. Click on the template saved for the web gallery. In our example this was 'My First Web Gallery.' All of the preset choices should be loaded.
If you make any changes to the layout or colors, be sure to save them with the template. Do this by right-clicking on the template name and choosing the update menu item shown below.
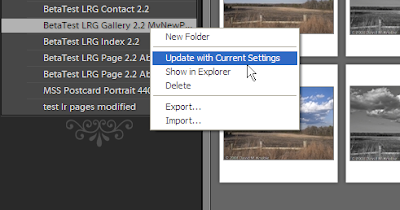
This saves all the current settings and updates the template for the next time.
Before uploading the site, check the FTP settings. If you created presets for the FTP Uploads then select that item. I prefer to create an FTP preset for each base web directory and each gallery subdirectory. This prevents me from having to remember each and every individual web directory.
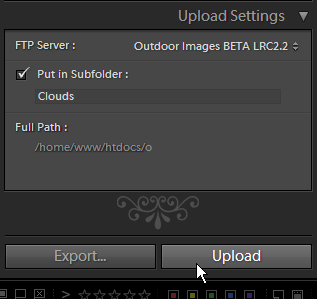
After uploading your site, view it in your internet browser to see the changes.
Conclusion
This is all it takes! Carefully setting up the collections and web gallery templates the first time makes maintenance a breeze. Even if you totally switch out the portfolio for different images, all the settings are there ready to go. Quick Collections are a must for anything more than a few pictures to add or create a collection with.
NOTES
If your web site has various subdirectories that get regularly updated, consider creating additional FTP presets. For example, if all your photo galleries are in a sub directory called 'photos' then create a second FTP Preset called 'My Web Site Photos' and set the directory to 'ftp://www.mydomain.com/photos'. This will allow you to easily add content without having to remember the subdirectory.
... Read More!
Don't forget to visit my photography web site where we sell museum quality black and white prints framed to last up to 175 years - Outdoor Images Fine Art.


